Tutorial · Menu builder
How to create a restaurant menu online (step-by-step)
This tutorial builds a complete restaurant menu from scratch — categories, items, prices, and photos — using real screenshots of every screen. By the end you'll have a live menu you can share as a QR code, a link, or a printable PDF. Plan on about twenty minutes.
Before you start
Gather your item names, prices, and one-sentence descriptions — a phone note or a crumpled paper menu is a fine starting point. Photos are optional; you can add them item by item later. In the screenshots below we build "Ocean & Farm", a demo California restaurant, from an empty account.
Create your menu
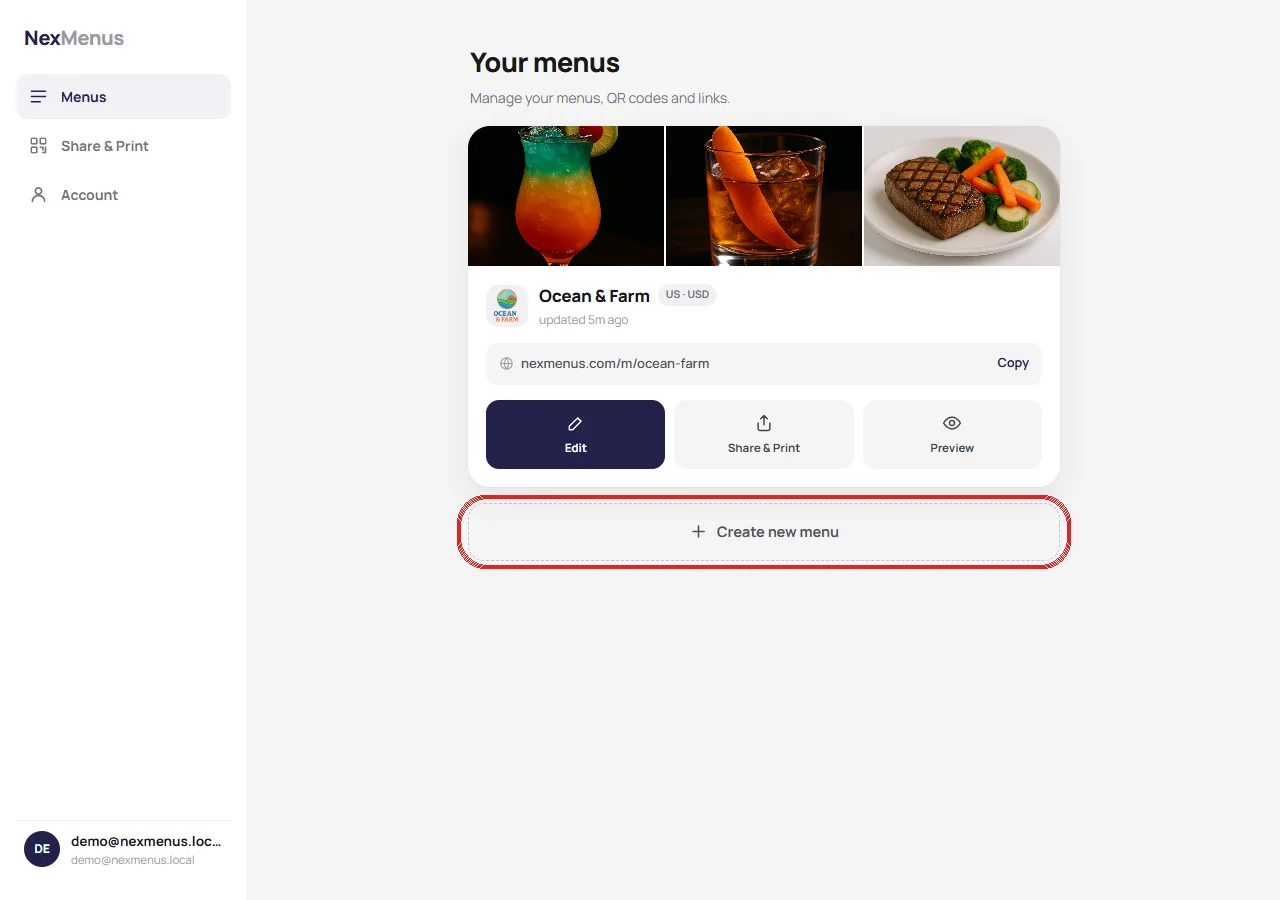
Sign up free and you'll land on Your menus. Click Create new menu:
Give the menu a name — usually your restaurant's name, or "Dinner" / "Weekend Brunch" if you'll run more than one — and pick your market, which sets the currency:
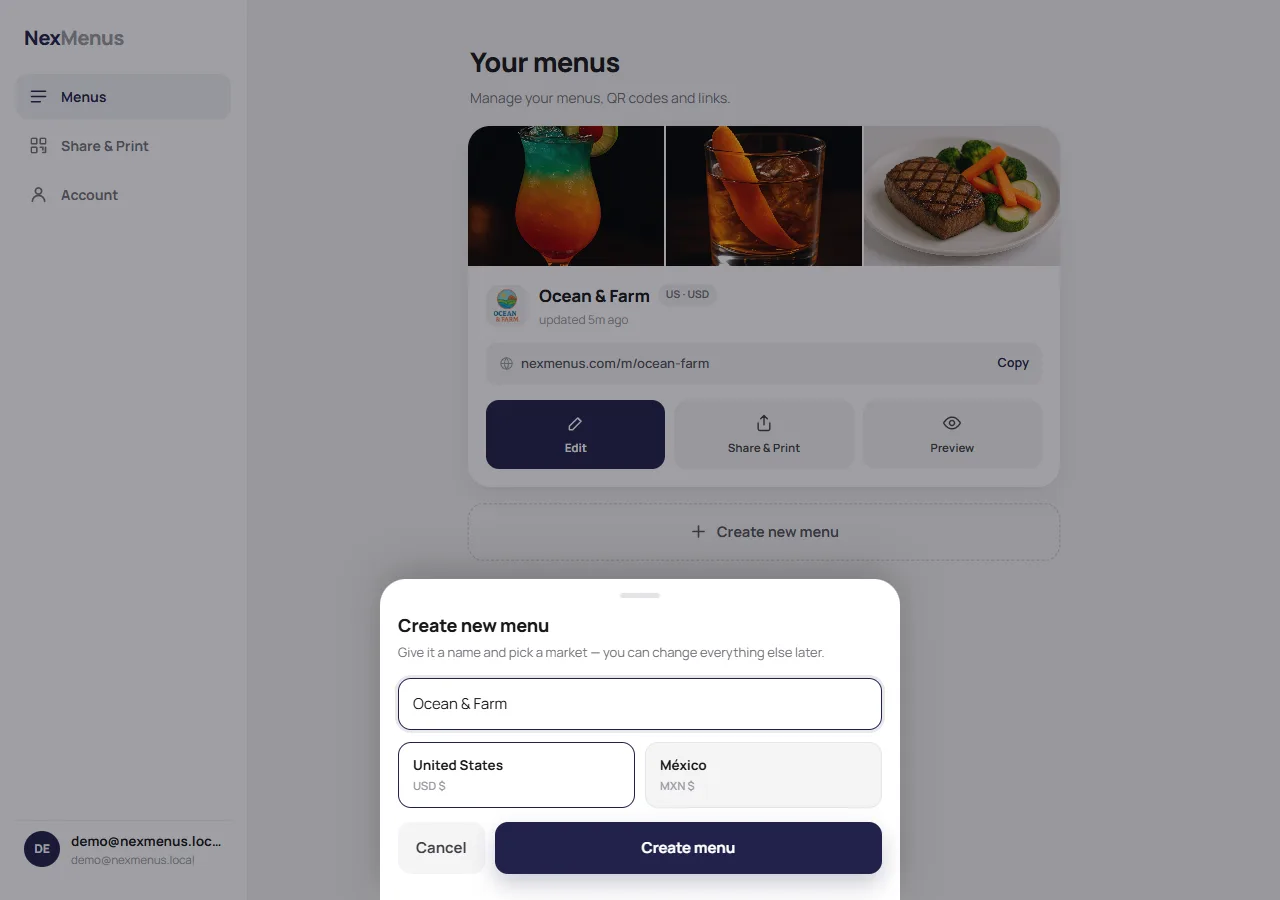
Your menu also gets a short public link automatically (like nexmenus.com/m/ocean-farm) — that's the address guests will open, and the one the QR code points to.
Add your categories
In the editor, click Manage next to Categories and add the sections guests expect to scan first: Appetizers, Mains, Drinks, Desserts. Keep it to four to six categories — more than that and the menu starts to feel like homework.
- Order categories the way people eat: starters before mains, desserts last.
- Split drinks out if you have more than a handful — a "Drinks" pill is easier to tap than a long scroll.
- You can rename, reorder, or delete categories at any time without touching the items.
Add items with prices and photos
Click Add item and fill in the form — name, price, description, category:
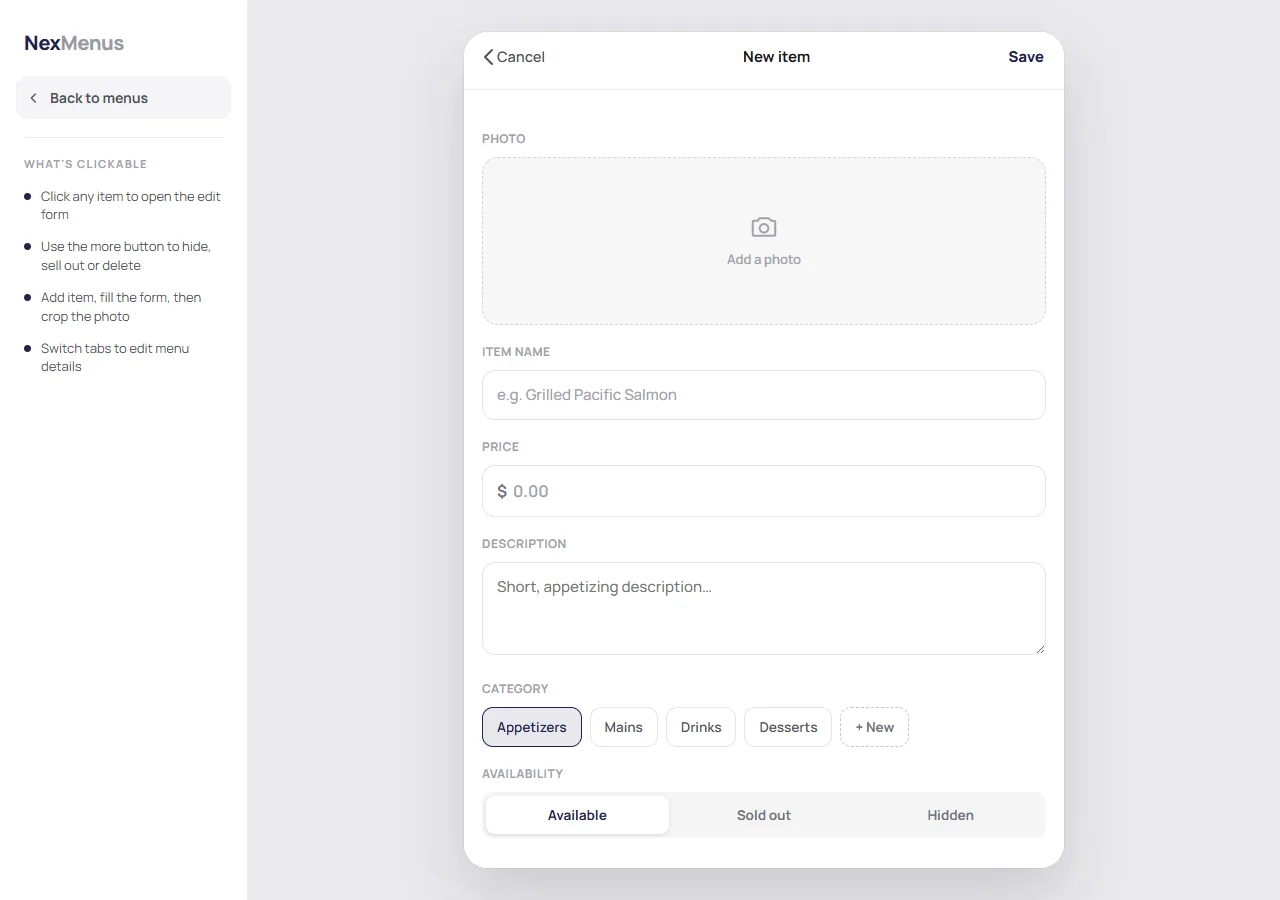
A few rules that make menus sell better:
- Keep descriptions to one sentence. Name the key ingredients and the preparation — "Grilled bread topped with fresh tomatoes, basil, garlic, and olive oil" — and stop.
- Use real photos of your food, shot from above or at 45° in daylight. A mediocre stock photo is worse than no photo.
- Photos are optional per item. It's fine to photograph your ten bestsellers and leave the rest text-only.
- Use Sold out instead of deleting. When the calamari runs out mid-service, flip the availability — the item comes back tomorrow with one tap.
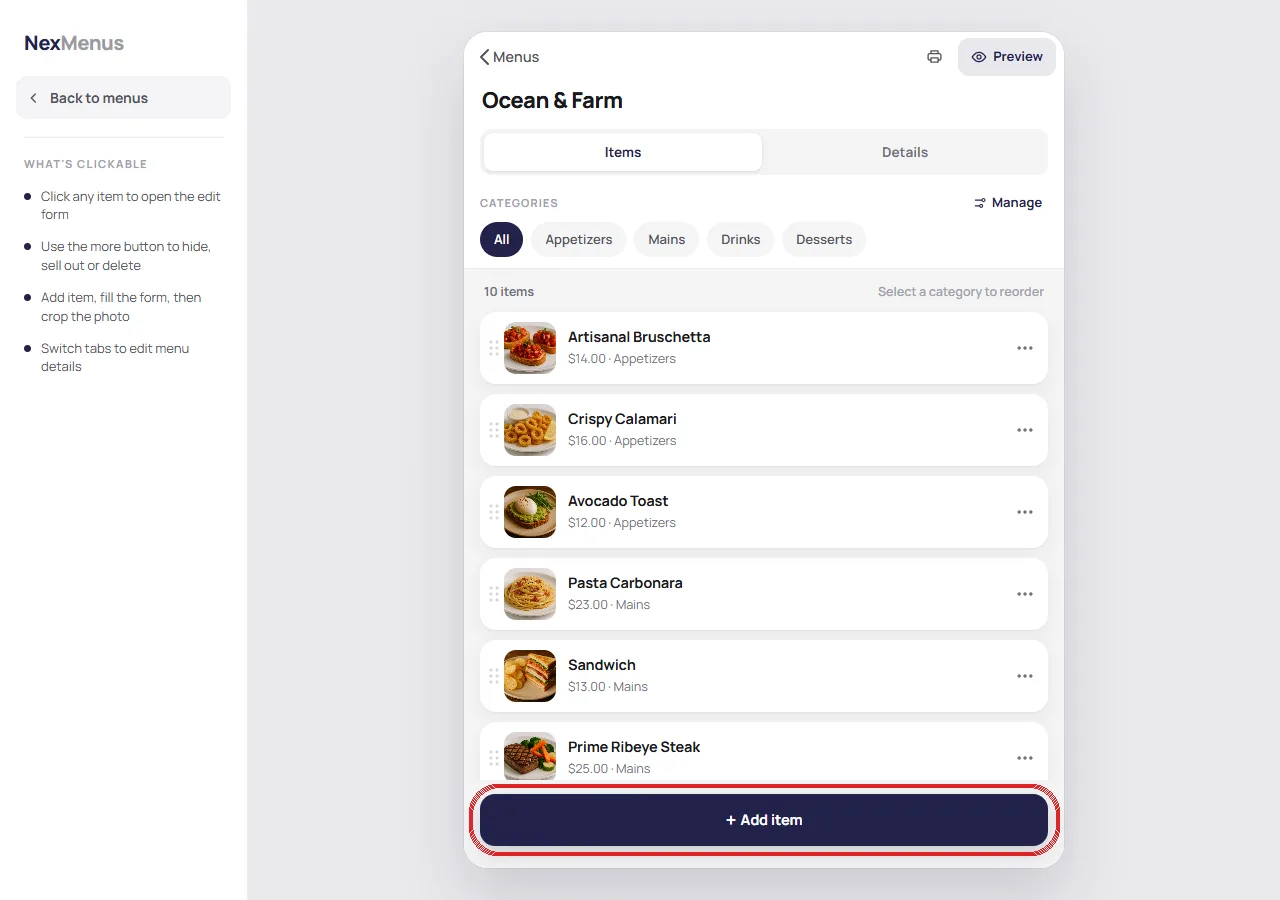
Repeat for each dish. Here's the editor with Ocean & Farm's ten items in place:
Add restaurant details and preview
Switch to the Settings tab to add the things guests look for besides food: address, phone number (this powers a tap-to-call button), hours, and your logo. Then click Preview to see exactly what guests will see:
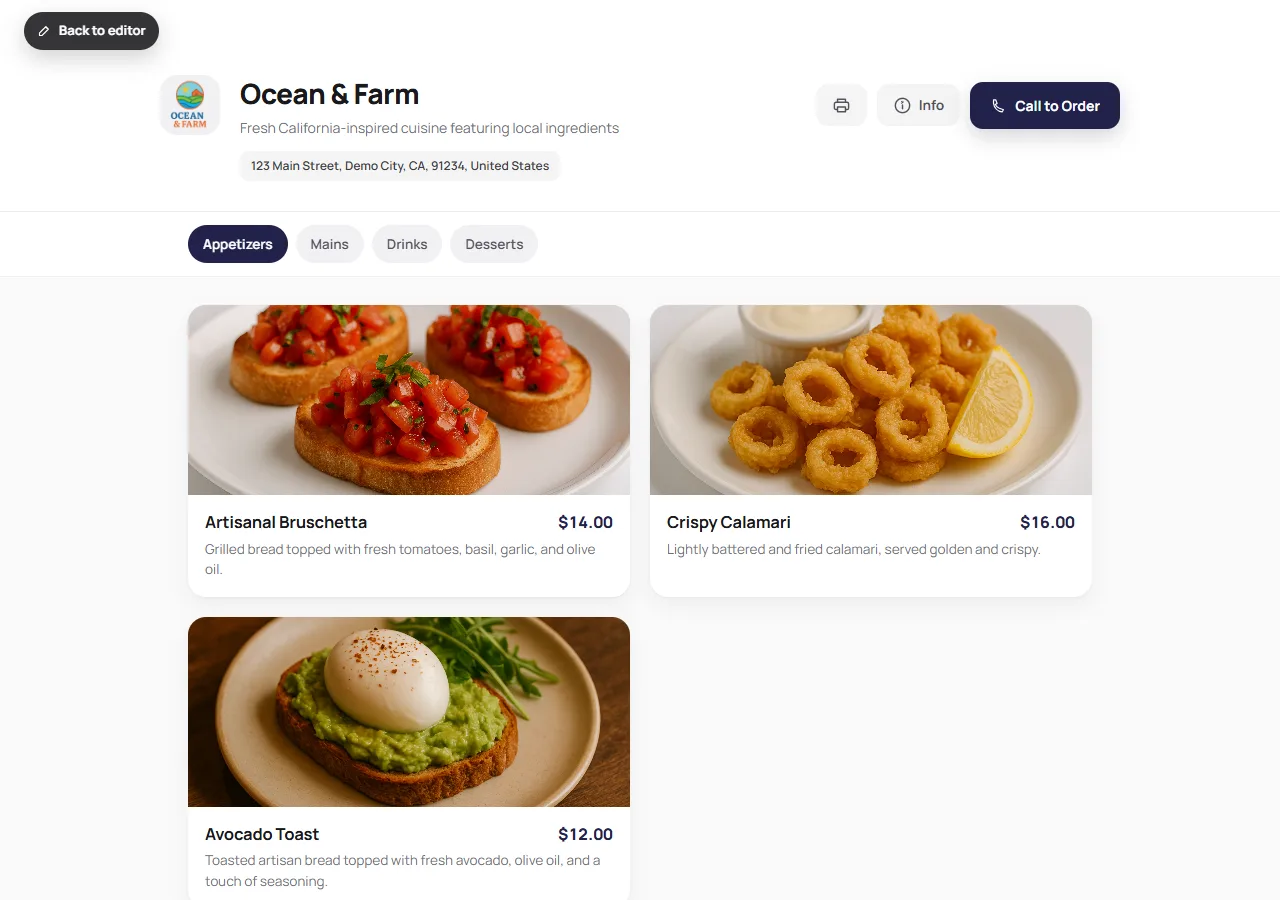
Check it on your own phone too — most guests will see the menu on a phone screen, not a laptop.
Share it: QR code, link, or print
Open Share & Print. From here you can download the QR code as a PNG for table tents and stickers, copy the short link for Instagram or Google Business Profile, or export the printable PDF menu:
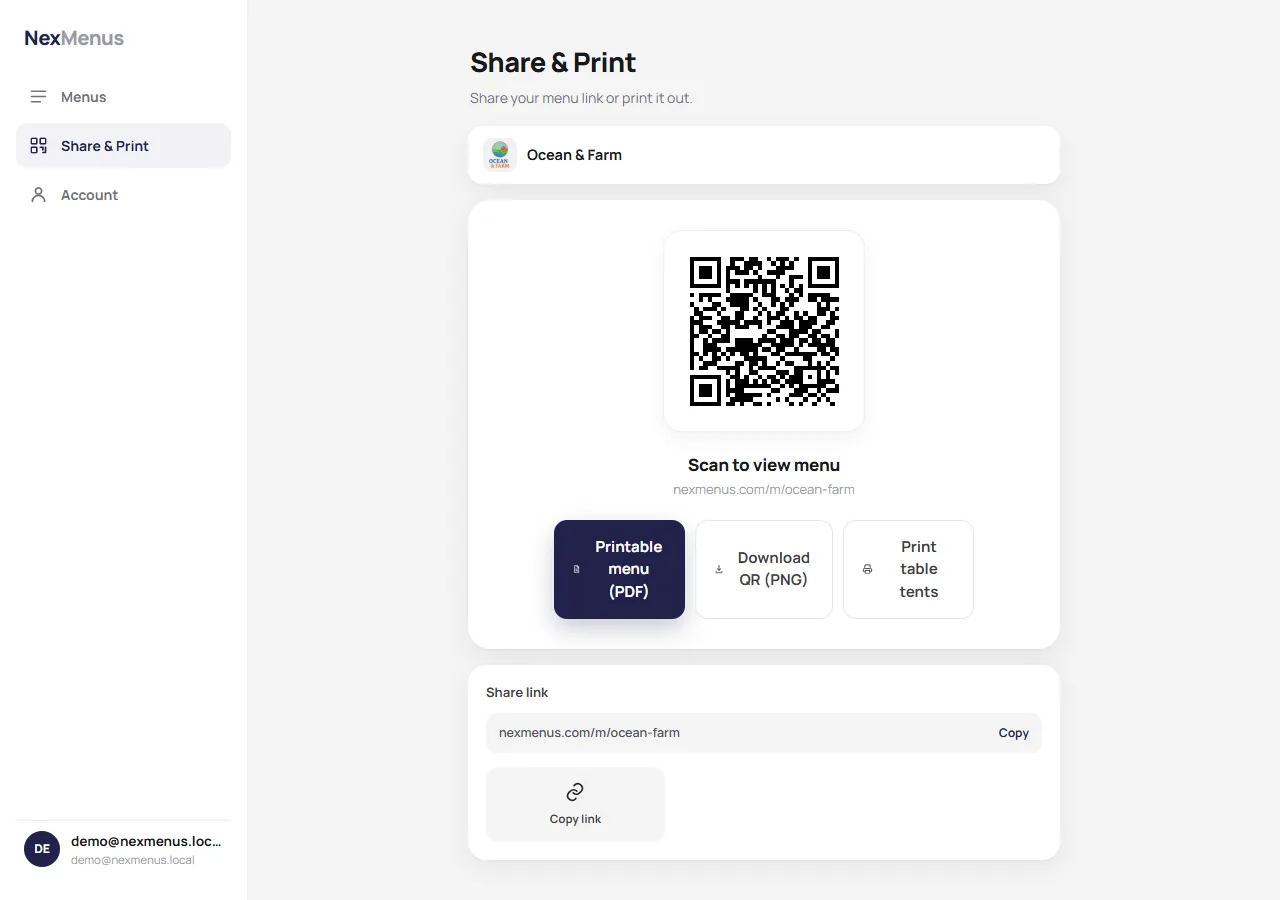
Need paper menus for the dining room or takeout bags? We wrote a companion tutorial for that: how to print a restaurant menu — it picks up exactly where this guide ends.
Frequently asked questions
How much does it cost to create a menu?
Nothing to start — creating a menu, sharing the link, and the QR code are free. You don't need a designer or any software beyond a browser.
Do I need photos for every dish?
No. Add photos where they earn their place — signature dishes and high-margin items — and leave the rest text-only. Items without photos still look clean on the live menu.
How many categories should a menu have?
Four to six for most restaurants. Guests scan categories before items, so each one should answer a real question: what can I start with, what's the main event, what do I drink.
Do menu changes go live immediately?
Yes. The QR code and link never change, so a price edit or a sold-out flag shows up for guests the moment you save — no reprinting QR codes, no re-uploading PDFs.
Can I create separate lunch and dinner menus?
Yes — create a second menu from Your menus. Each menu gets its own link and QR code, so lunch tables and dinner tables can point to different menus.
Bottom line
To create a restaurant menu: sign up, name the menu, add four to six categories, enter each item with a price and a one-sentence description, add photos to the dishes that deserve them, fill in your address and hours, and share the QR code or link. From the same menu you can also print a paper version whenever you need one.